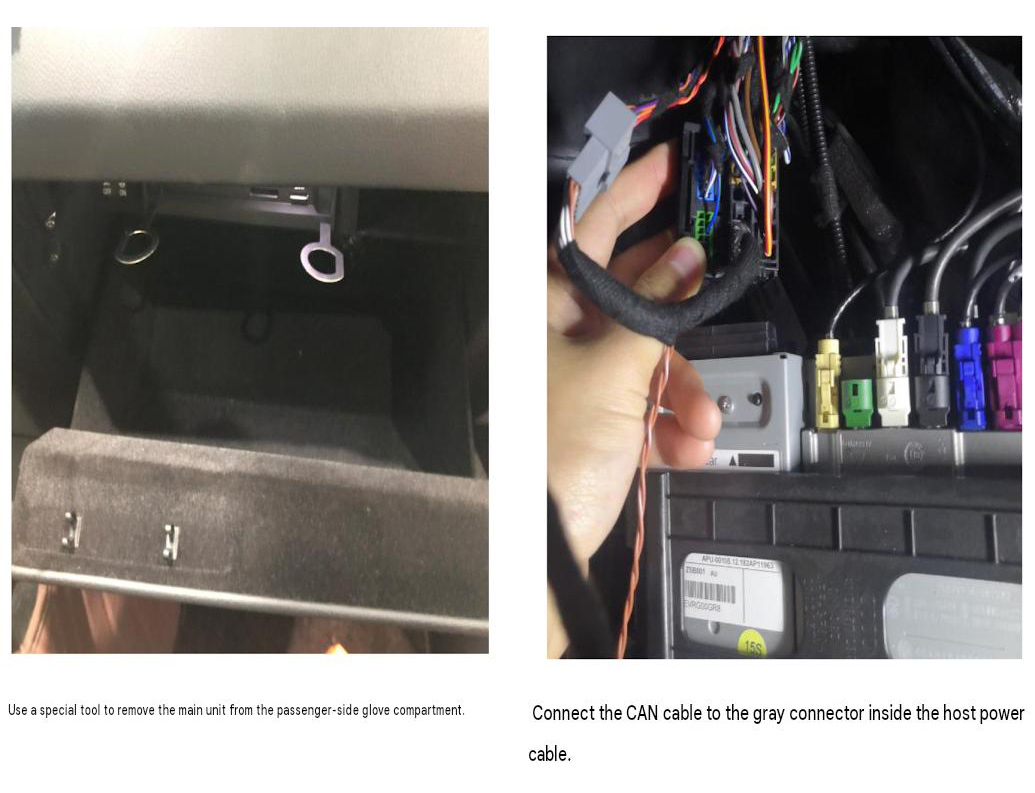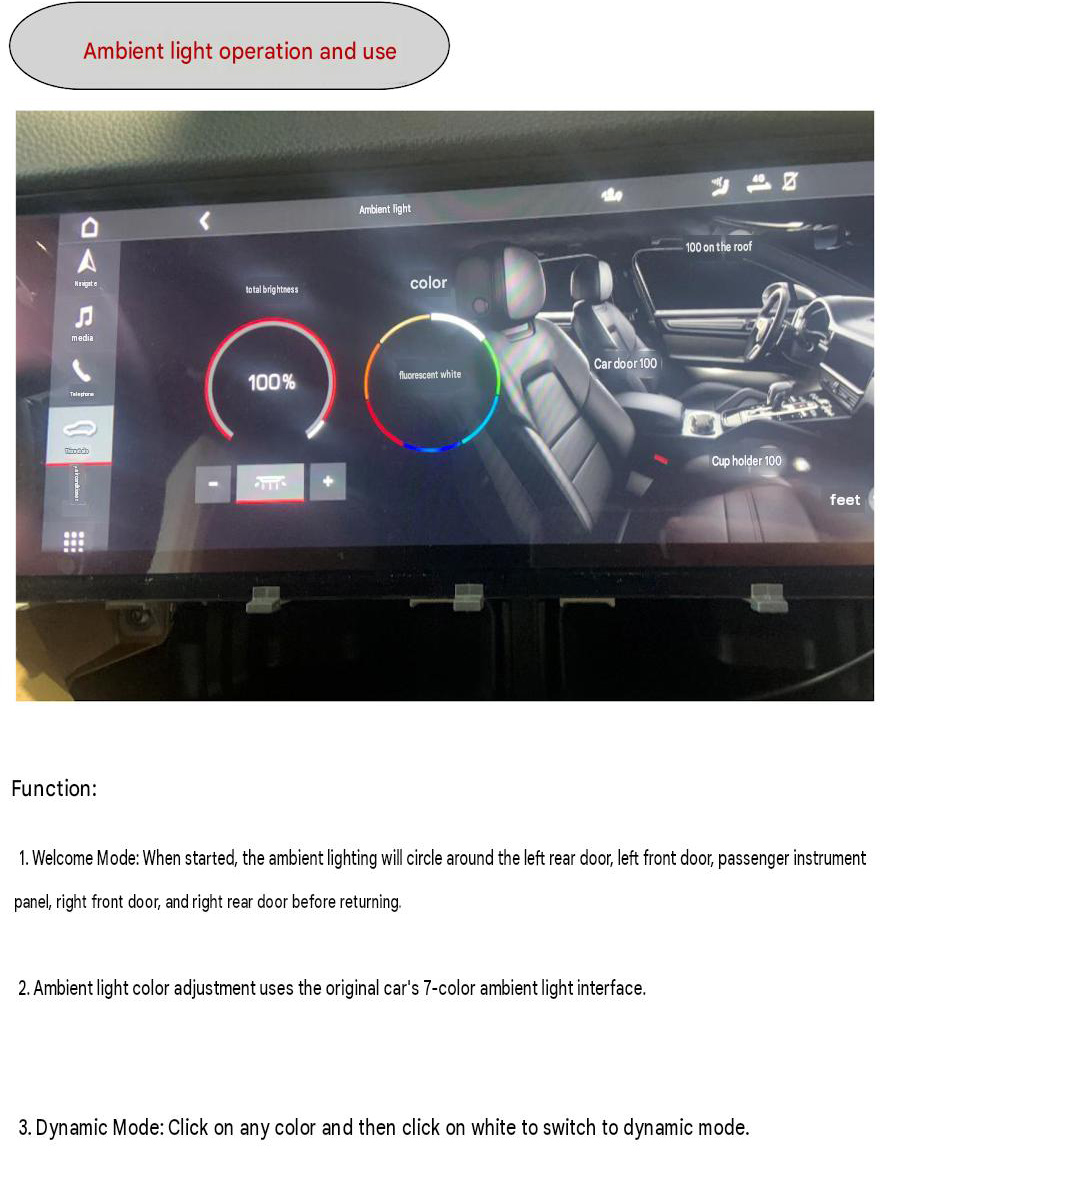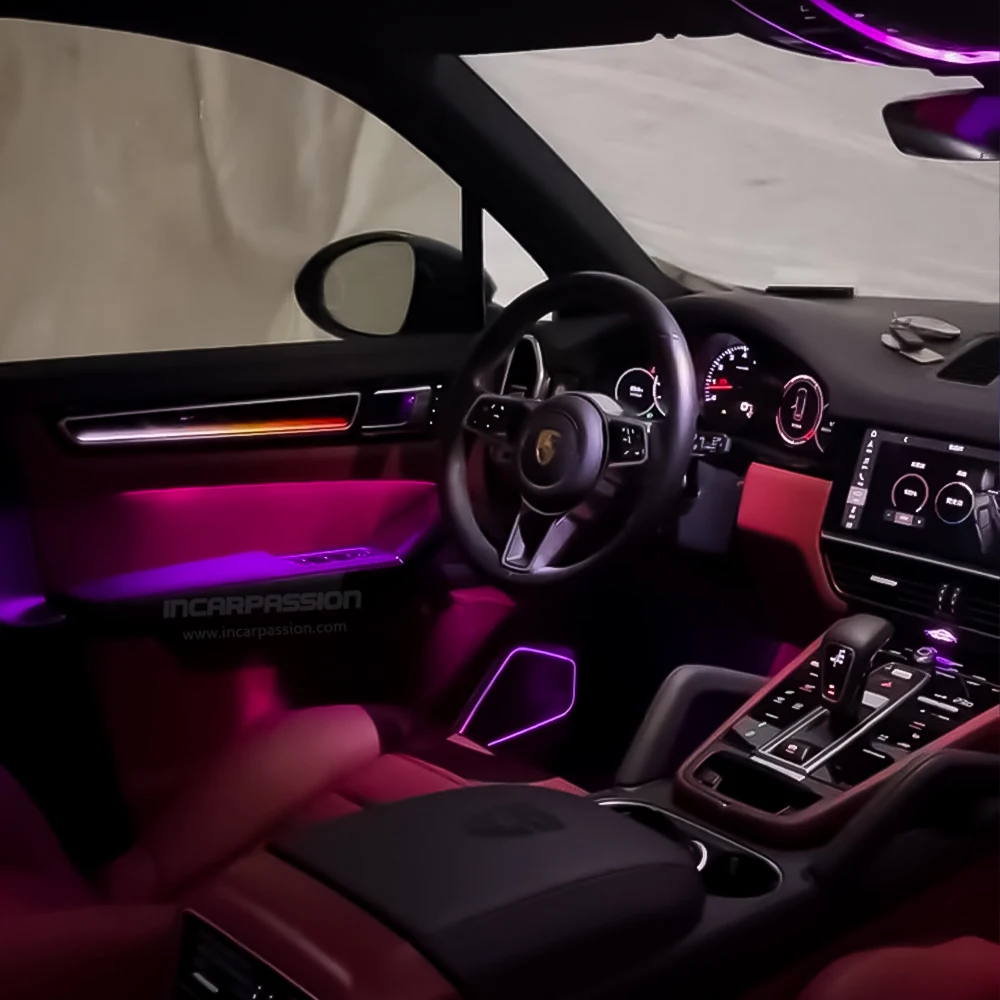

Thank you for choosing the Porsche Cayenne Dynamic Ambient Lighting Kit. Please read this guide carefully and verify all parts before installation. Ensure the vehicle is completely powered off and use plastic trim tools to avoid damaging interior surfaces. Professional installation is recommended; contact our support team if you need assistance.
Part 1: Door Installation (Universal 4-Door Process)
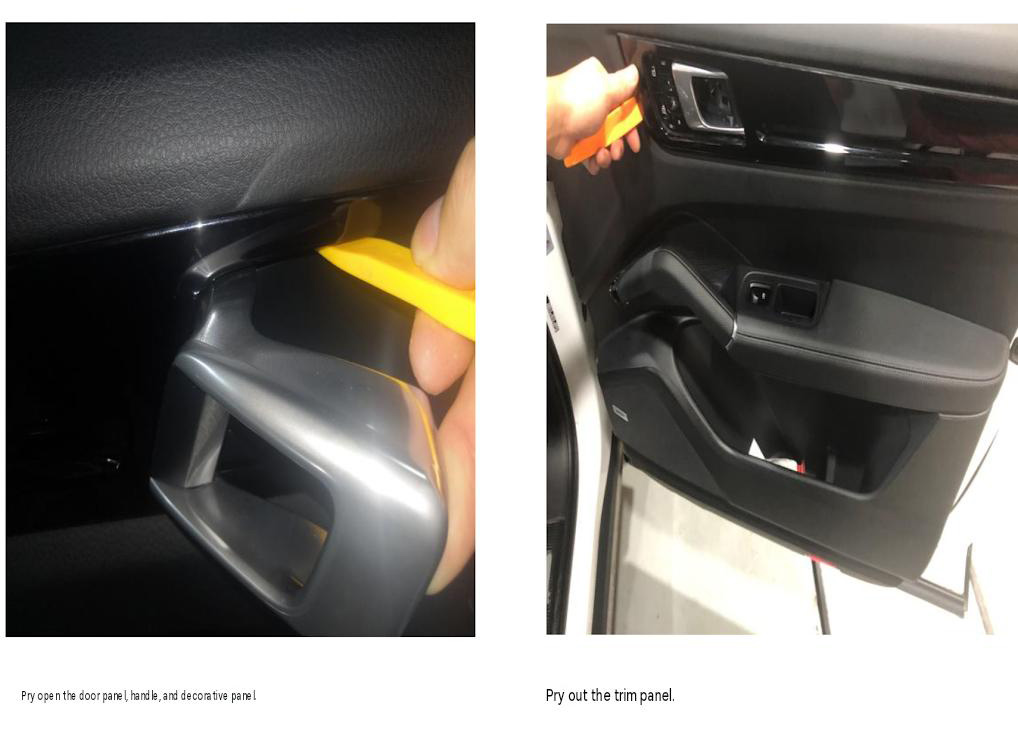
Locate Screws and Pry Off Trim Panels
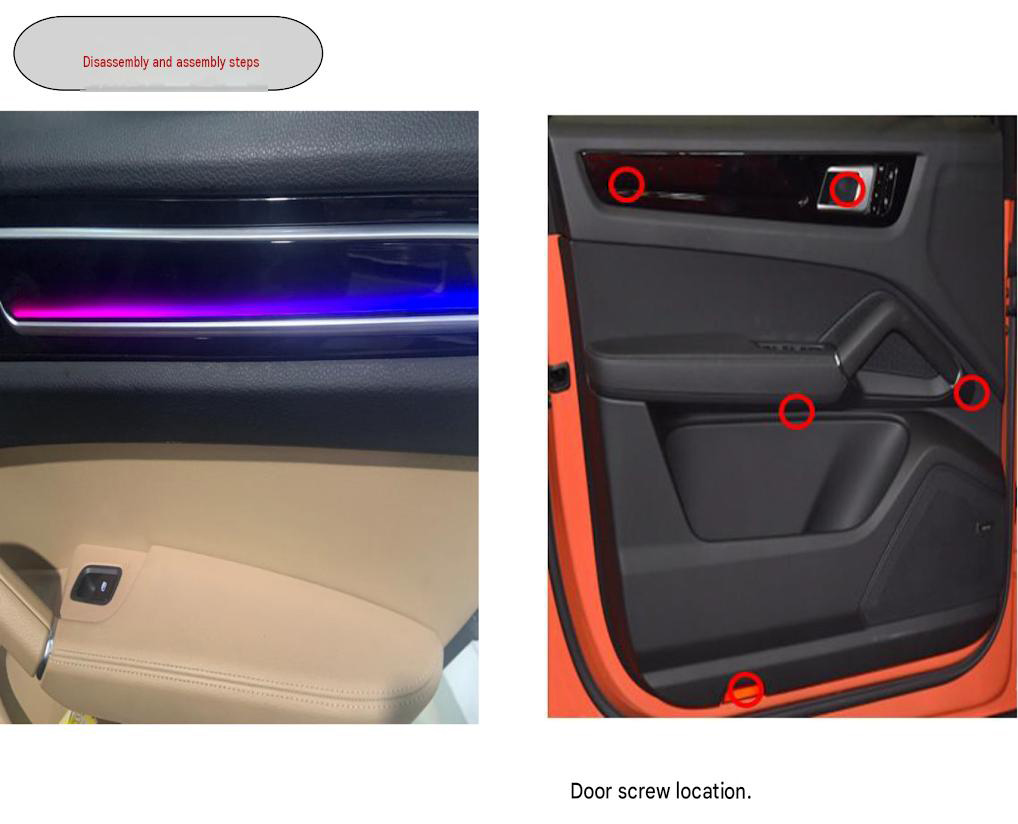
Each door panel has 4 fixing screw locations (behind the long trim strip, behind the inner door handle, beneath the armrest, and near the bottom warning light).
Carefully use a plastic trim tool to pry out the inner door handle trim and the long decorative trim strip above it.
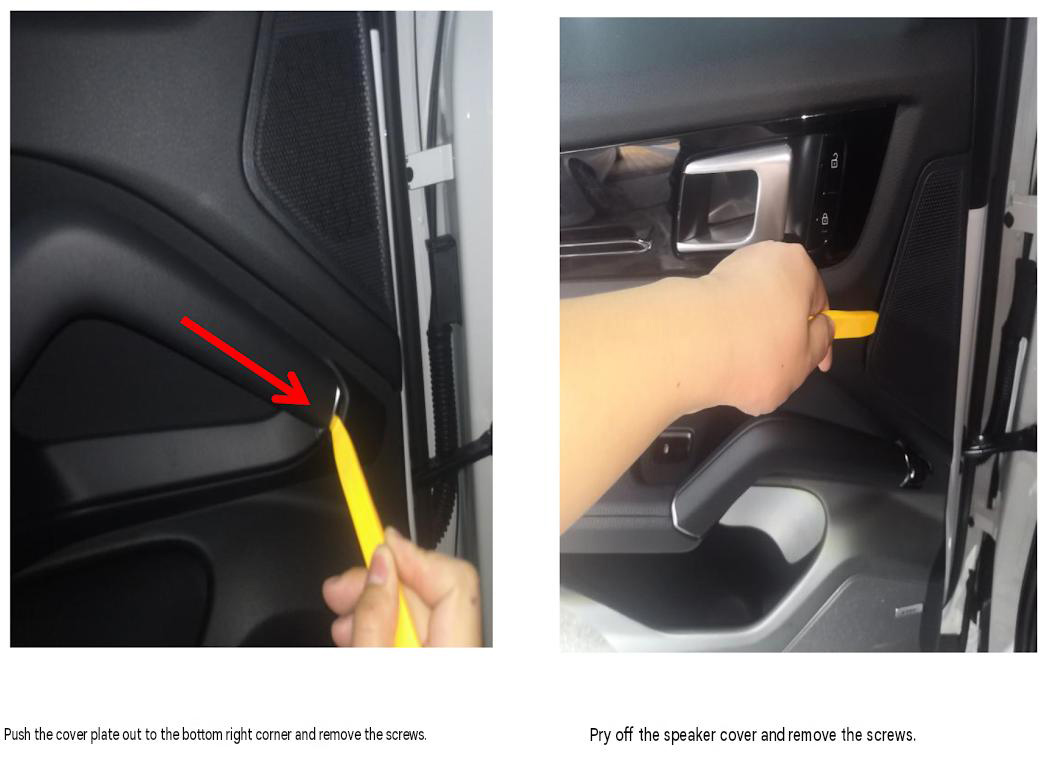
Remove Remaining Covers and Fixing Screws
Push the small cover plate at the rear end of the armrest outward toward the bottom right corner and remove the internal fixing screw.
Pry off the tweeter/midrange speaker grille and remove the internal fixing screw.
After removing all 4 fixing screws, gently pull outward to detach the entire door interior panel.
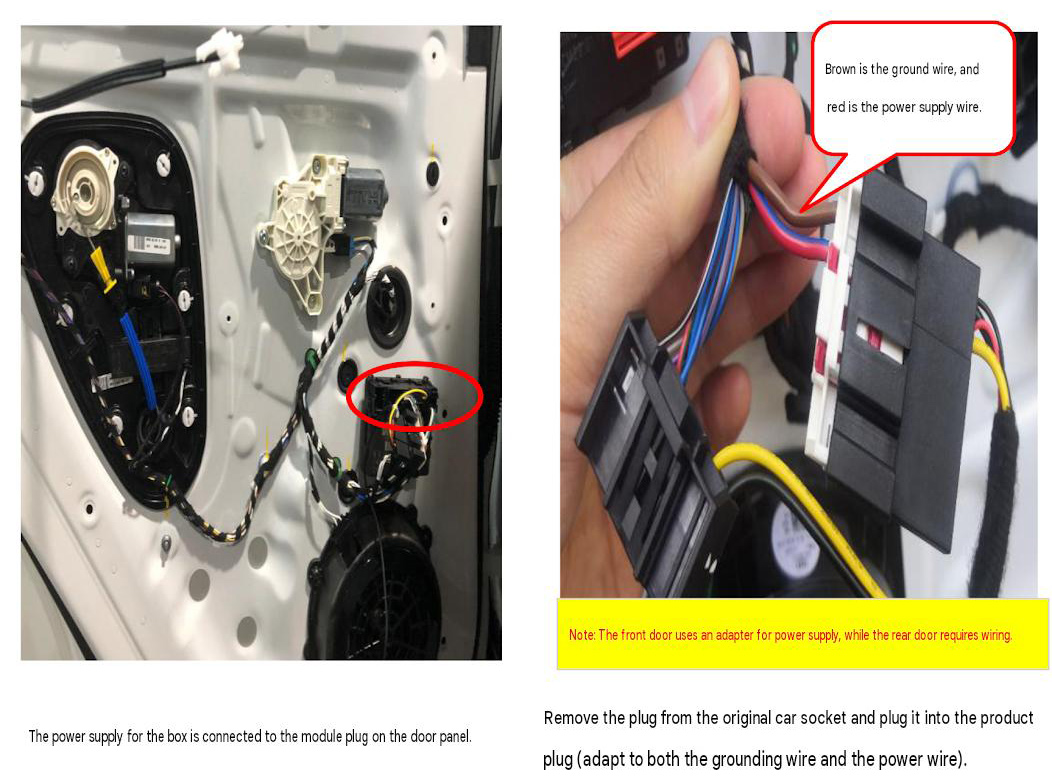
Door Control Box Power Connection
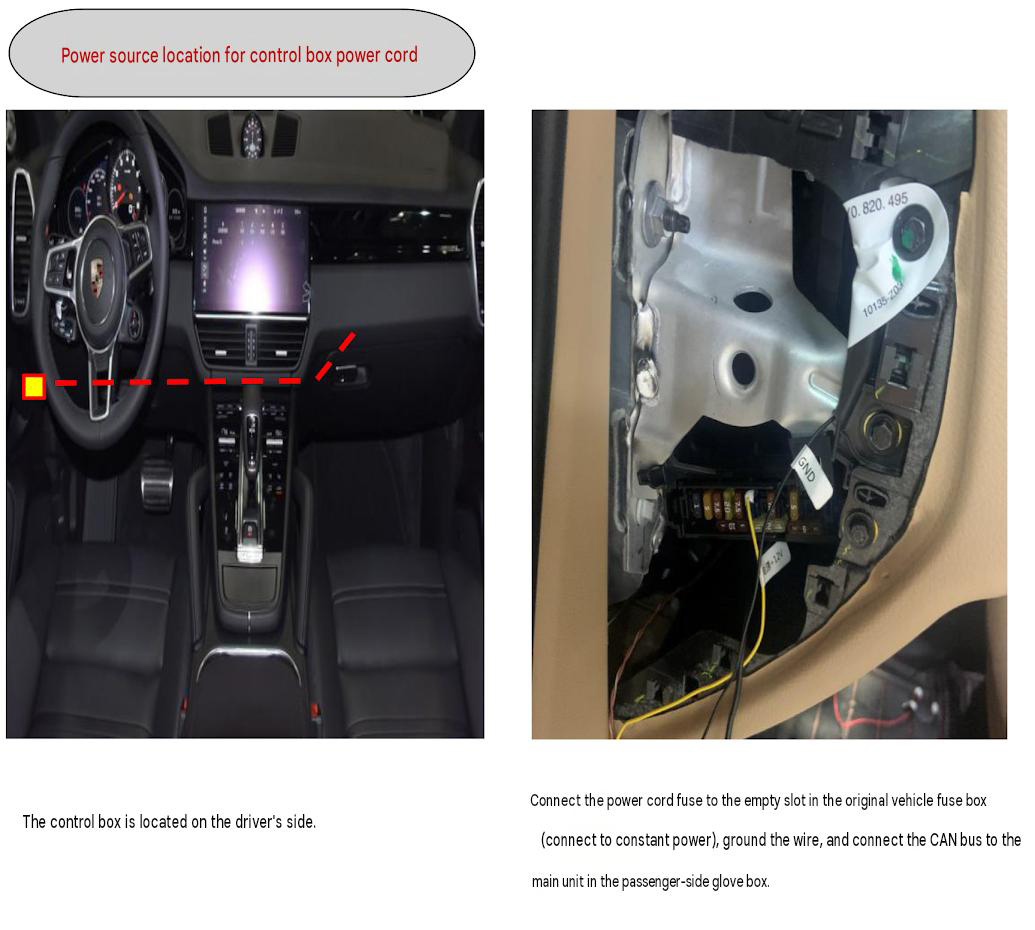
Locate the door control module plug inside the door panel, unplug the original factory connector, and connect it to the product harness (adapt only two wires: brown for ground/earth, red for positive power).
Note: The front doors use a lossless plug-and-play adapter for power supply, whereas the rear doors require manual wire splicing according to the wire colors.
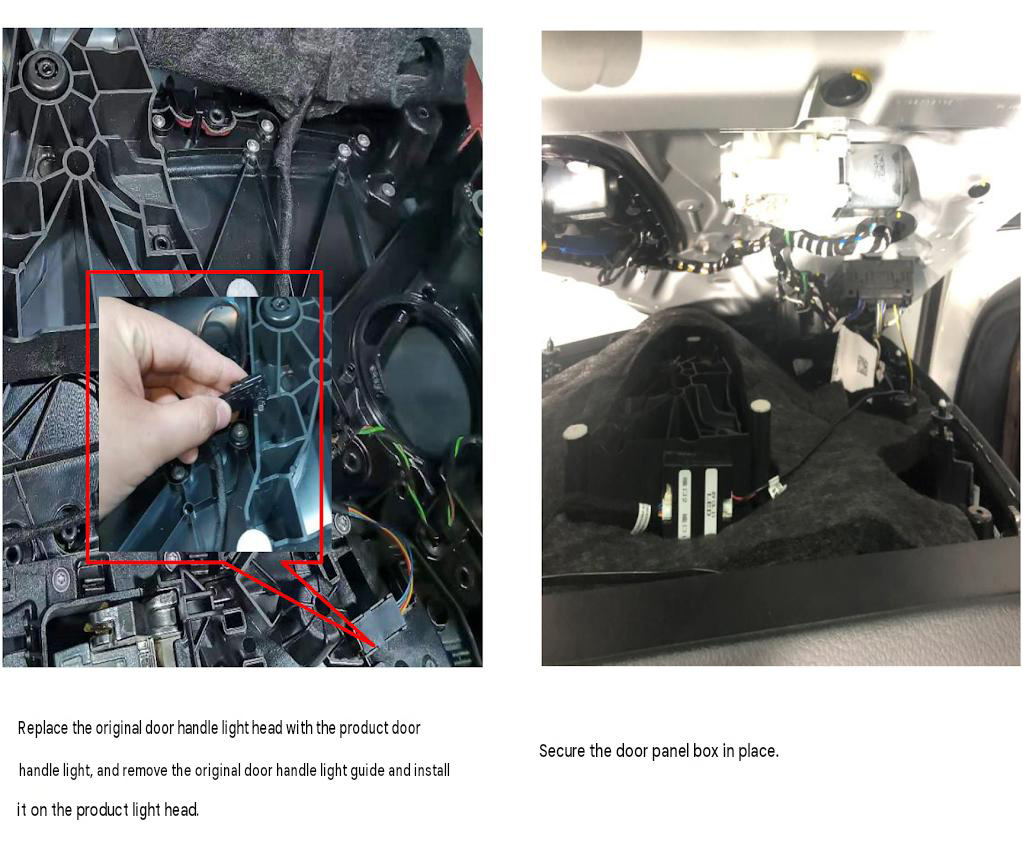
Replace Handle Lamp Head and Secure Control Box
Remove the original inner door handle lamp head, detach the factory light guide piece and install it onto the product's new lamp head, then mount it back into place.
Securely fasten the door control box inside the door panel where it will not interfere with the window regulator or panel clips.
Reinstall Door Panel and Connect Illuminated Trim
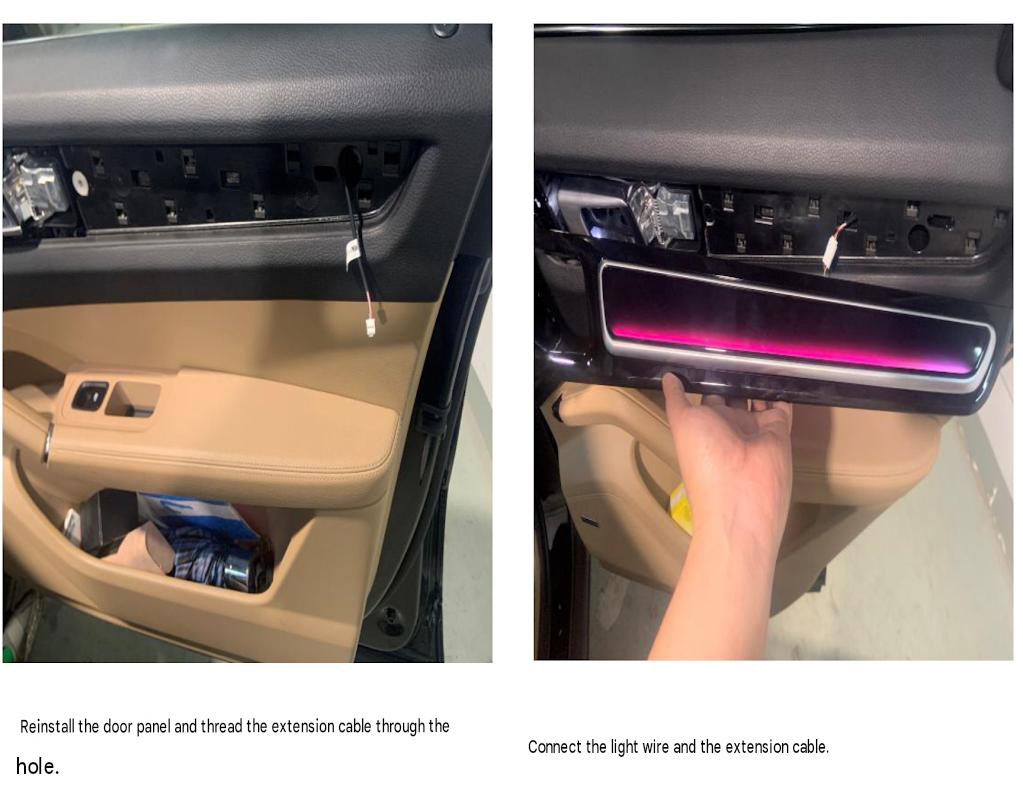
Route the ambient lighting extension cable through the pre-cut hole in the door panel, align the clips, press firmly to reinstall the door panel, and tighten all fixing screws.
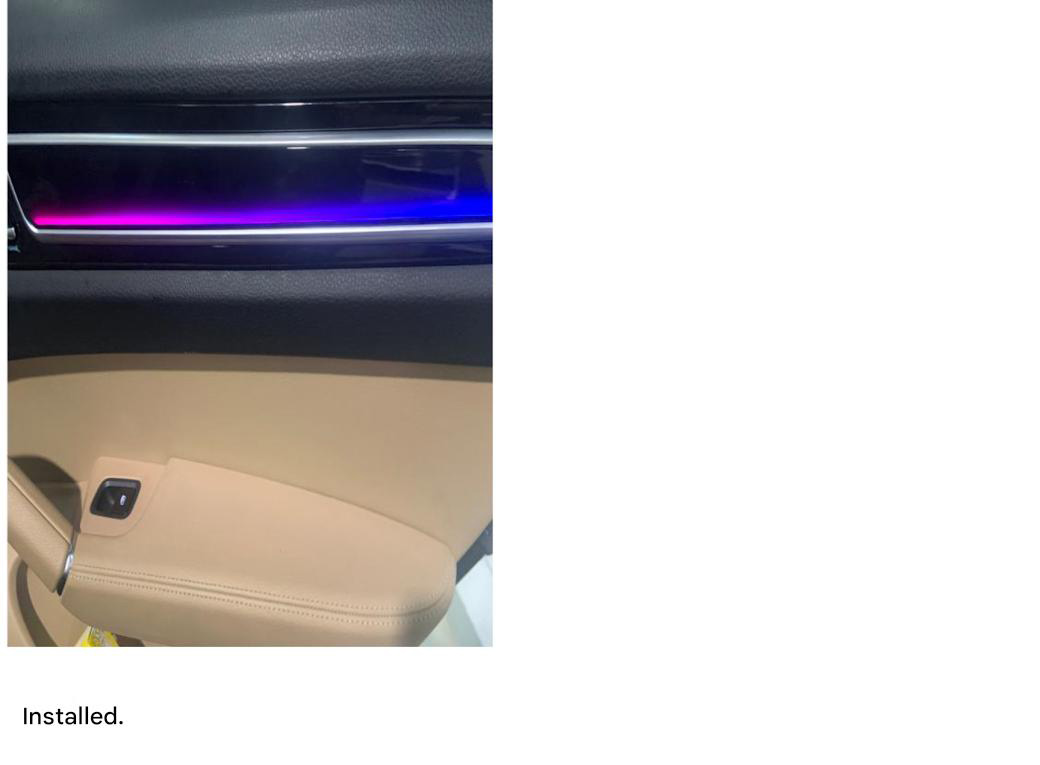
Connect the new illuminated trim's light wire firmly to the extension cable, test that it lights up properly, and press the trim panel back into place to complete the door installation.
Part 2: Center Console & Dashboard Installation
Plan Center Console Wire Routing
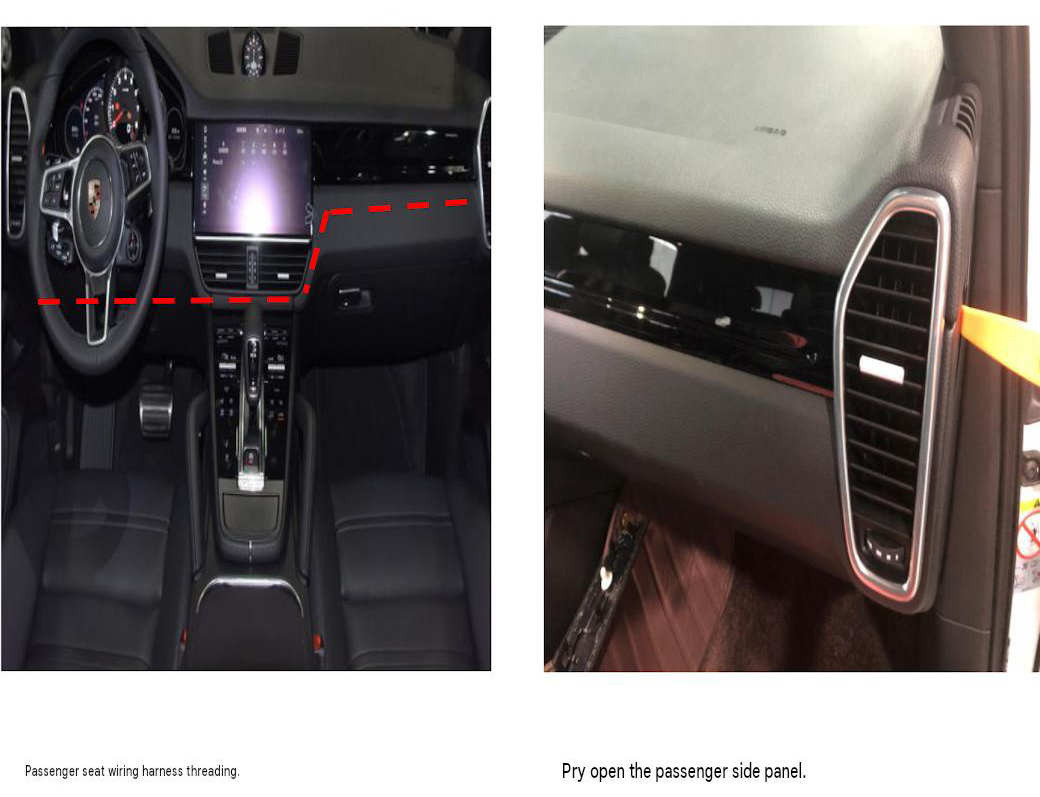
Route the wiring harness from under the driver-side dashboard across the bottom of the center console to the front passenger glove box and dashboard trim area (follow the red dashed routing path).
Remove Passenger Side Panel and Air Vent
Open the front passenger door and use a plastic trim tool to pry off the right side dashboard cover.
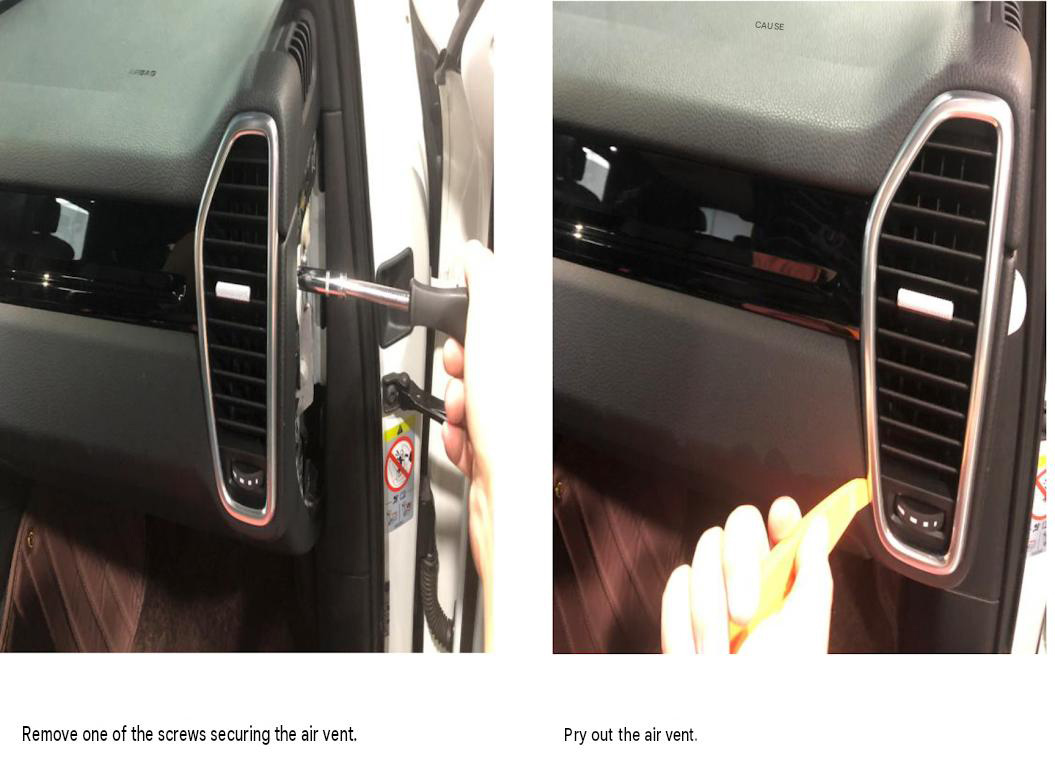
Unscrew the 1 fixing screw securing the right air vent, then carefully pry out the entire air vent assembly along its edges.
Remove Passenger Dashboard Decorative Trim
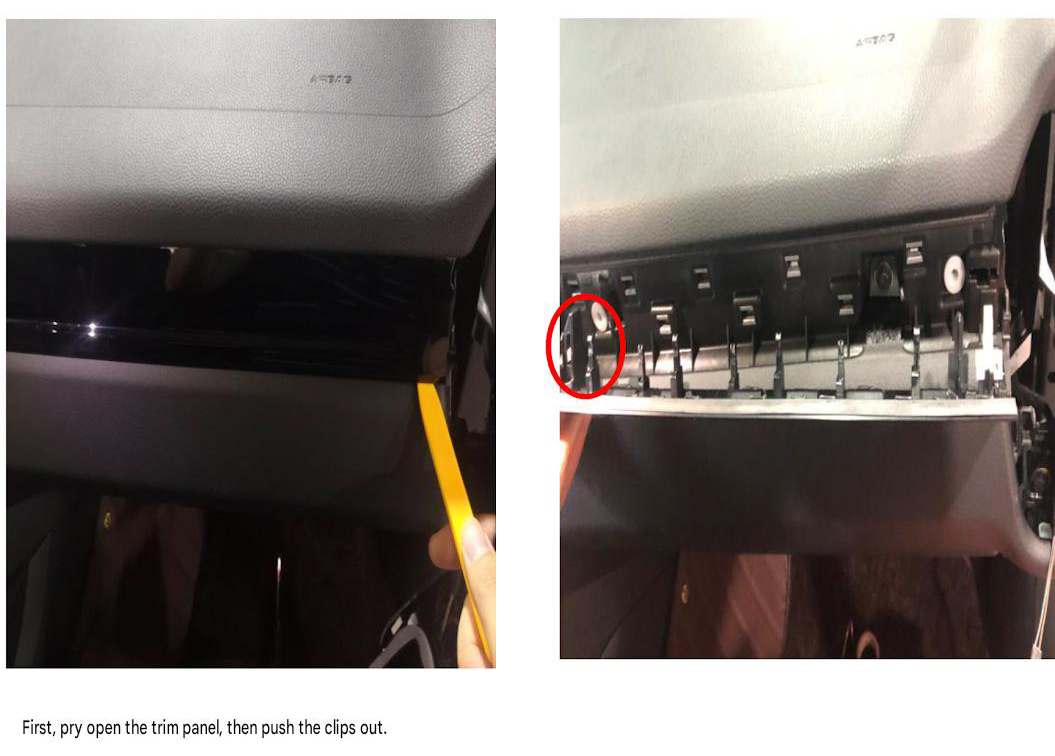
Use a plastic trim tool to gently pry and loosen the passenger-side dashboard trim panel from its edge.
Once loosened, push out the internal retaining clips from the inside (pay attention to the clip structure circled in red) to remove the entire trim strip without damage, then complete the passenger light strip replacement and reassembly.