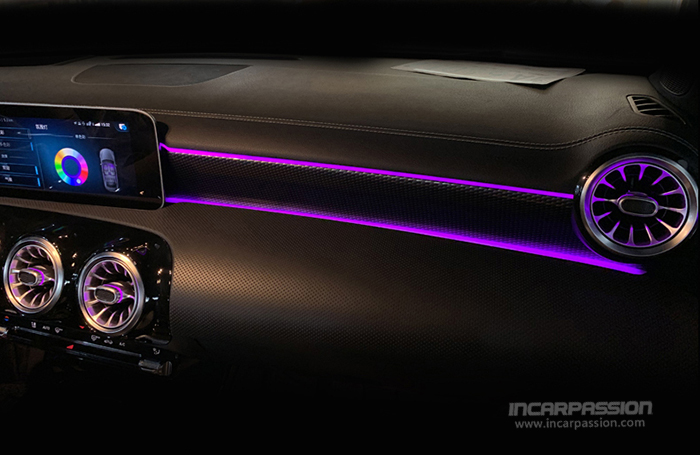
Here’s a installation instructions showing you how to install Mercedes A Class W177 64 colors ambient light
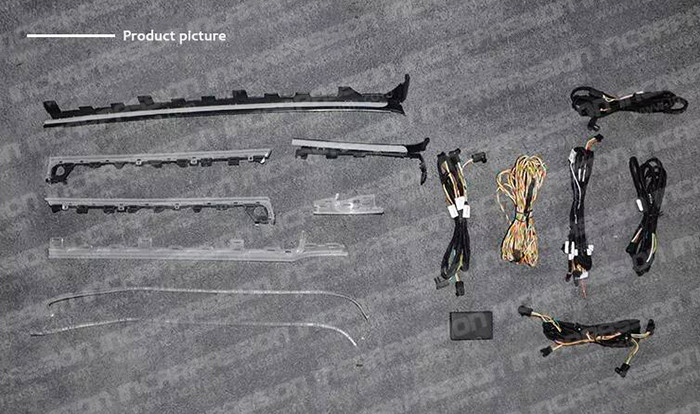
Product link: Mercedes Benz A Class W177 64 colors ambient light
Note: Need to do coding to activate the original ambient light menu, otherwise the ambient light will not work. We suggest you do the coding before installing the goods
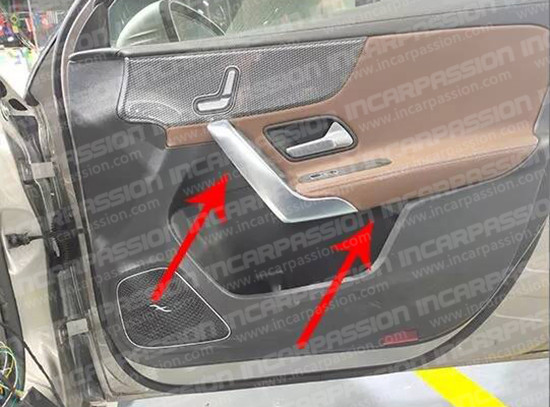
Remove the 2 pcs T30 screws from on the door panel, use plastic board to open the door panel
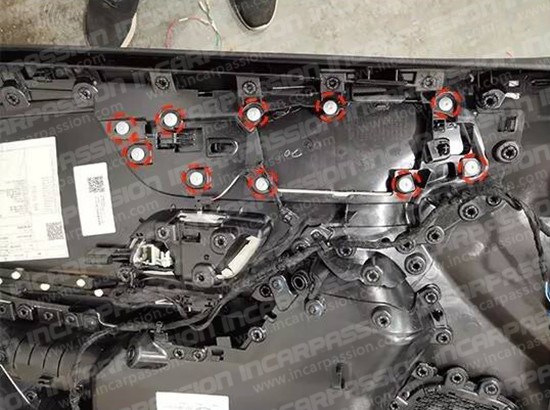
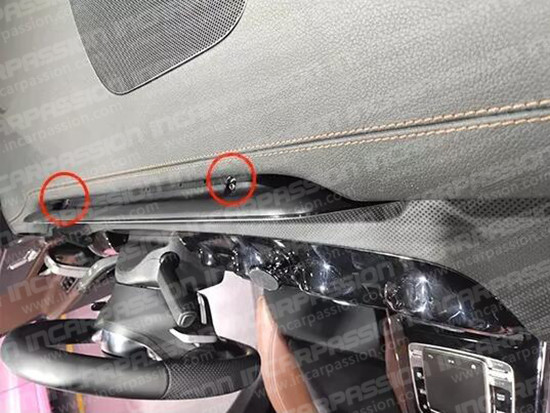
Remove all the screws as the picture show, remove the wooden panel
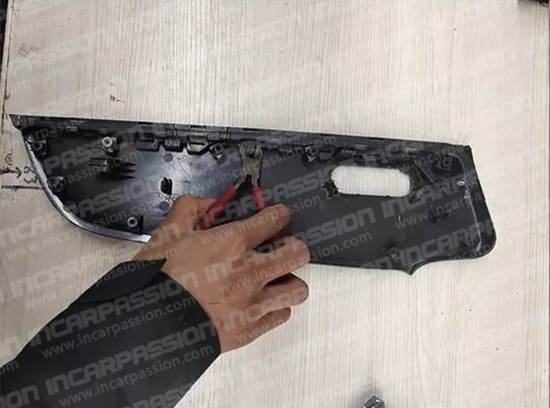
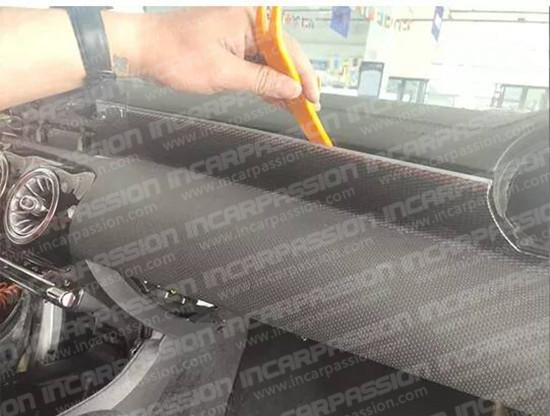
Remove the original soldering point of the decoration board by electric iron or pliers and install our board with light (dashboard lights also do it like this way)
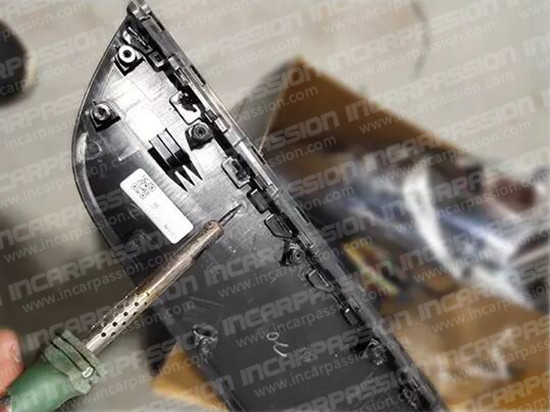
Use electric iron to fixt the board with ambient light, or use the hot glue to fix it
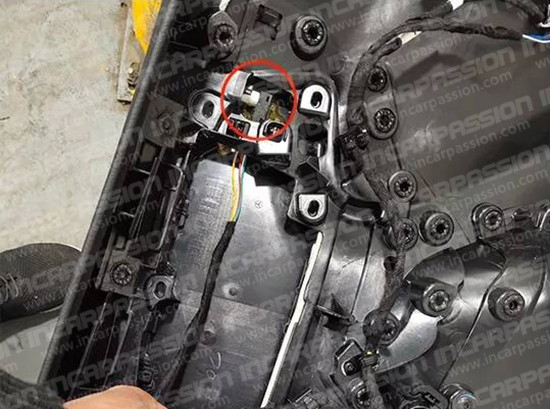
Install our hardness with lamp, make sure the lamp is plug into correct position. The LED chip must be in the middle of the light strip. Then use tape to fix the cables
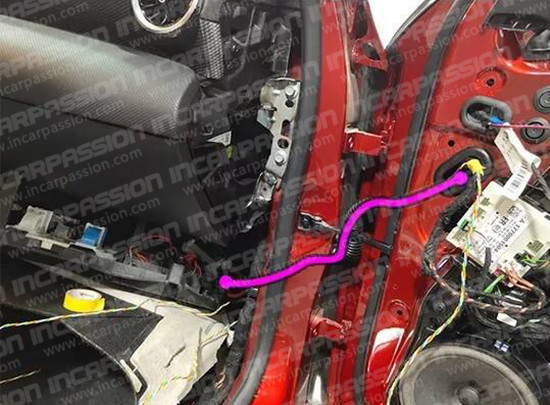
The extend cable go through the pipe on door(as purple line show in picture) to door panel, then connect to our ambient light
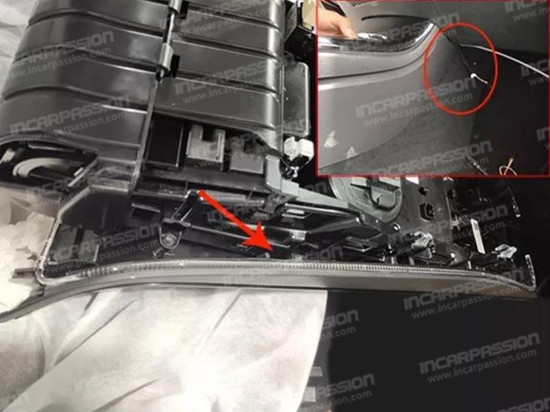
Use plastic board to pry out air vent (inside does not have screws, just pry out)
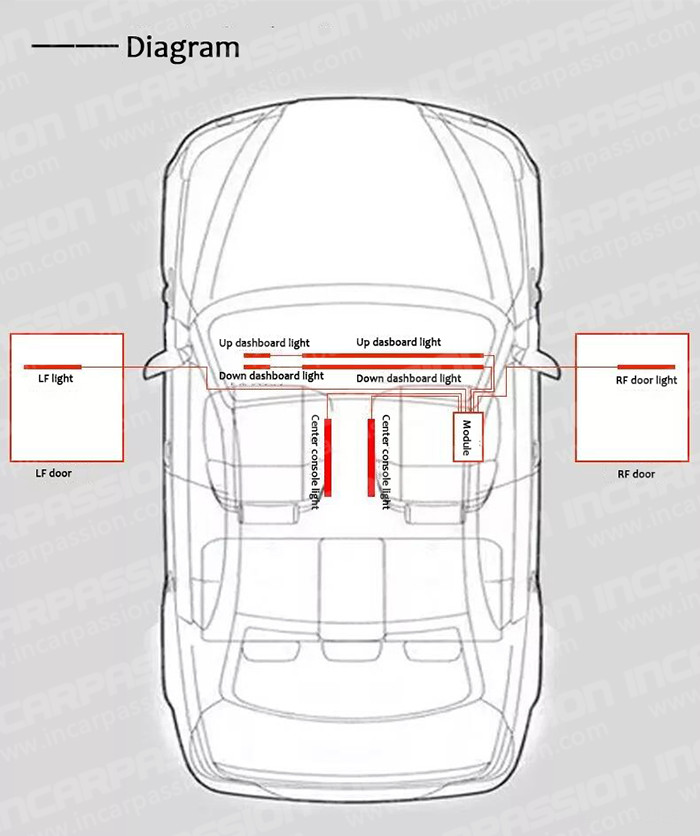
Remove the dashboard wooden board, then install our lights(same way as door lights), there’s up light down light, 3 light heads is for down light
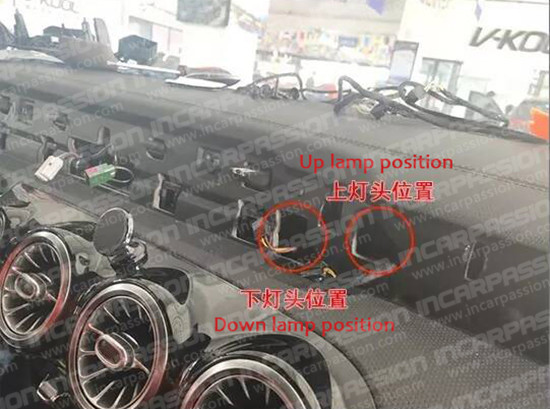
Cable go out through the hole as picture show, there’s up and down dashboard light, when installing the ambient light, make sure the light head is plug to correct position
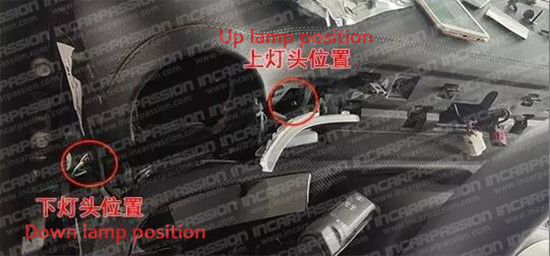
Cable go out through the hole as picture show, there’s up and down dashboard light, when installing the ambient light, make sure the light head is plug to correct position
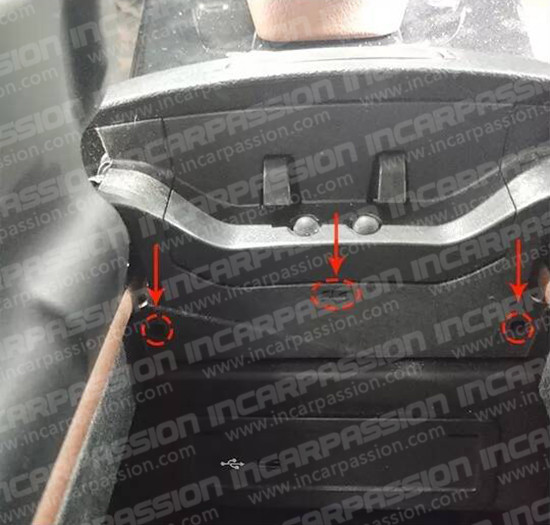
Remove the saddle, use small screw driver to prop the red circle position upward(as picture show), to remove the armrest box switch decoration board, then remove the 2 screws inside
Use plastic board to pry the leather part out, inside has 3 screws, 2 screws under the armrest box switch, total 5pcs screws need to remove, then pull the saddle out
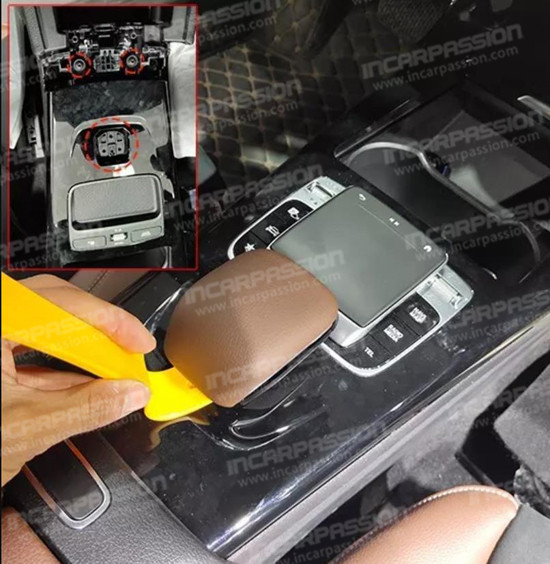
Use our center console light to stuck in the original gaps of 2 sides of saddle, connect the ambient light hardness, also connect the hardness to the front right side foot lamp position
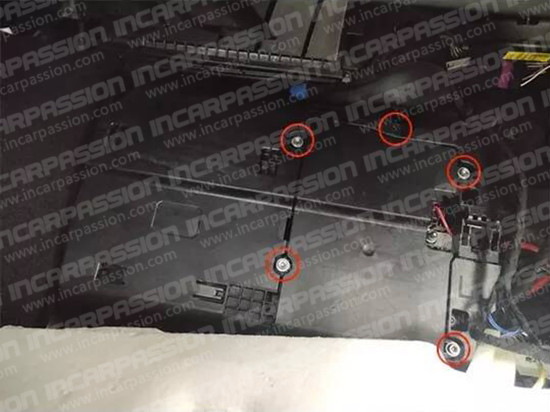
Romove the 5 screws as picture show, passenger threshold protective board, right side triangle board, foot are protective board, then pull out the carpet, find the fuse, the ambient light module connects to F142, module also fix here
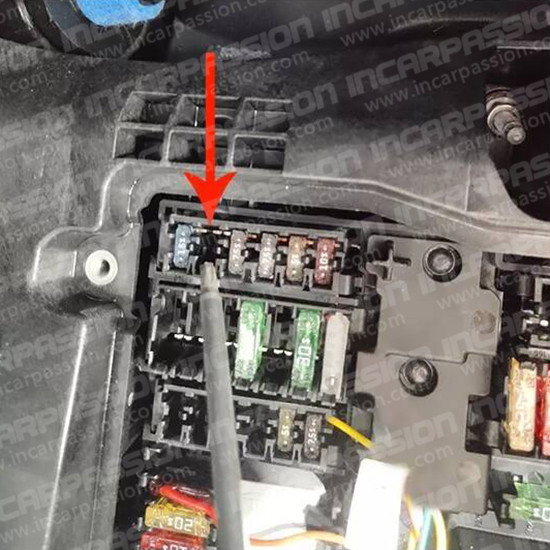
Fuse F142 position( arrow position), on backside of the fuse, is the position to connect CAN
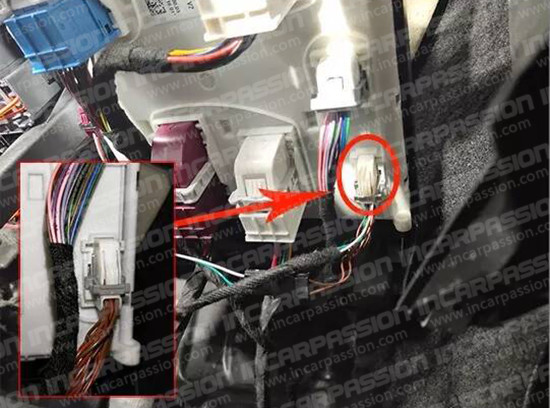
On backside of fuse, find the STERN socket of SAM module(as red circle are), our ambient light module CAN purple cable connect to PIN 18, white cable connect to PIN 8
Trouble Shoot
1. If only one pc ambient light color not synchronize: check the 4 cables if loose; the cable soldering sequence if same as other light, if PIN is plugged into hole well, if PIN is broken
2. If all lights not work, use multimeter to check if the module has power, if yes, pull out the module cable, after one minutes, re-plug it again
3. Light color not changed or not same as the menu, do the same thing as step 2
4. If the light is dark, check light case, light head if loose, or check if the light head is put to correction position
5. 5, If all lights not work, check if CAN cable is connect wrong, use multimeter to check the 2 CAN cables if there’s power to module (CAN cable is white and yellow cable)