This installation instruction will show you how to install the a electric tail gate lift system for Mercedes E Class W212, so we can open the trunk automatically and smoothly via a button or key.
Product link: Mercedes Benz Electric Tail Gate Lift, Hand-free Access Trunk
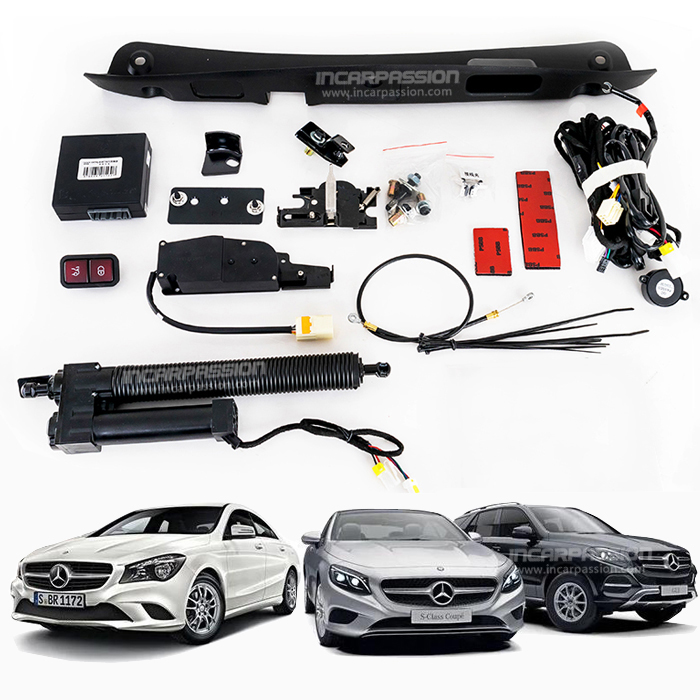
1, cable layout
2, Remove the buckle as the picture show remove the plastic board
3, remove the screw cap as the picture show
4, remove the trunk right side buckles and screw caps (note: take out the light cable)

5, Remove the buckle as the picture show
6, Remove the buckle as the picture show
7, Remove right side spring
8, Fix the rivet with professional rivet gun

9, Install the rear bracket
10, Install the trunk right side electric pole front bracket
11, Install the product pole

12, Use the product plastic location card to make a location in original buckle(as arrow show), use a small drill to make a hole, then use 9.5 twist drills to expand hole
13, At arrow position use 9.5 twist drills to make a hole, then install the suction lock (note the center position)
14, Suction lock motor install to this position
15, Find the fuse box on right side, find the twist cable, brown and brown red cable connect our red signal cable to brown red cable, orange signal cable to brown cable

16, Positive cable connect to the circle position(as picture show)
17, Negative cable connects to the circle position (as picture show)
18, cable and connector connects to the arrow show position (pull out the ECU power fuse before connecting to controller)
19, Remove the buckle as picture show take out the plastic board

20, Install the button to the product plastic board then restore the car

 Audi
Audi BMW
BMW Mercedes Benz
 BYD
BYD Ford
Ford Geely/ZEEKR
 Honda
Honda Hyundai Kia
 Jaguar
 Jetour
 Lamborghini
 Land Rover
 Lexus
Lexus Li Auto
 Mazda
Mazda Nissan
 Porsche
 Tesla
Tesla Toyota
 Volkswagen
 Volvo
Volvo