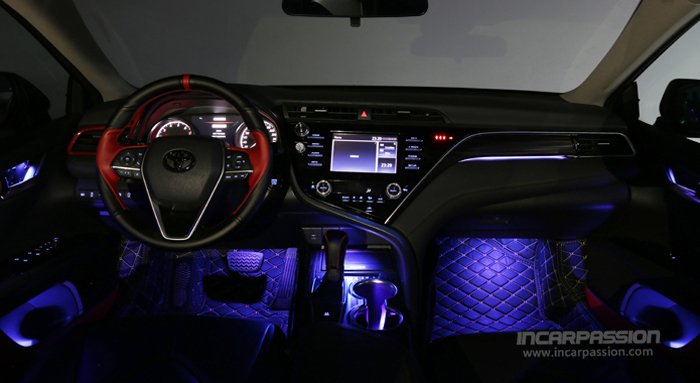
This installation tutorial will show you how to install our 64 colors Ambient Light for 8th generation Toyota Camry, add multi-color ambient lights to the car.
Product Link: 8th Generation Toyota Camry 64 Colors Ambient Light, Foot Light
Camry Ambient Light (dashboard light+ cup holder light+ center console storage box light + front foot light + door trim light + handle light + door storage box), total 17pcs led(dashboard 1pc, cup holder 1pc, center console storage box 1pc, front foot 2pcs, handle light 4pcs, door trim 4pcs, door storage box 4pcs)
Note: after install, if ambient light can not work, need to use apps to set the light color, see below instruction for reference.
Door light installation
1, Diagram as picture show(in multi-color mode, handle and storage box is same color, door trim different color)
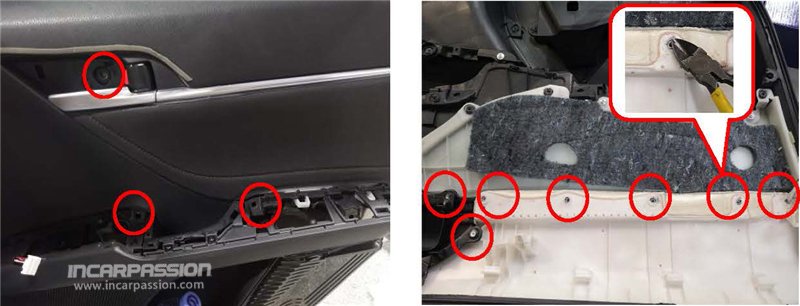
2, Remove the button and cable behind it

3, Remove the screws and pry out the door panel
4, Cut the soldering point, remove handle screws, then take out the door trim
5, Replace original trim with the ambient light trim

6, Light strip go through door panel hole, install back the trim, use the screws come with product to fix it
Note, after install, test if handle can work normal

7, Door have 3 lights: storage box/handle/trim
① Use the driller come with the product to make hole inside storage box position and install the light pcb
② Use the 5mm driller the make hole in handle position and fix the handle light with glue
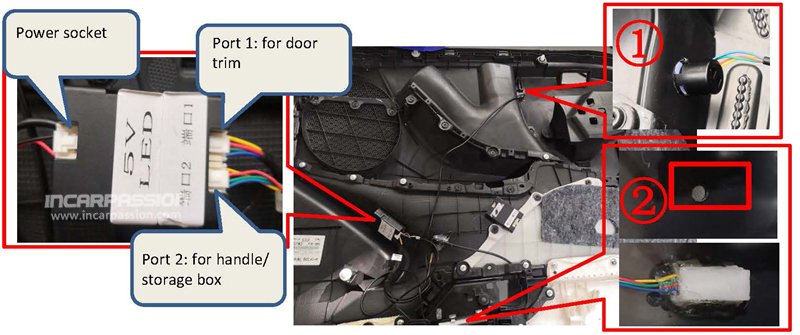
Driver door power cable connection
Power cable connects to door button socket left side #2 ACC cable, GND cable connects to right side #1 black/white cable

Other 3 doors power cable connection method
Power cable connects to door button socket left side #2 ACC cable, GND cable connects to black/white cable

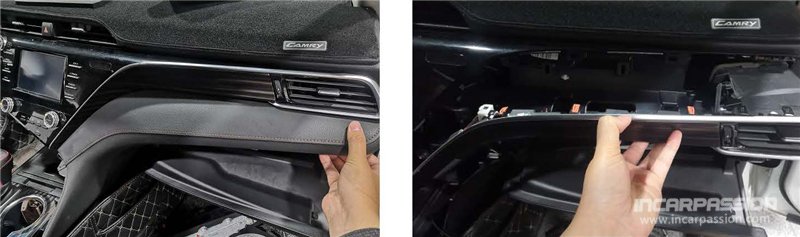
Dashboard light installation
1, Layout
2, Remove the center console trim
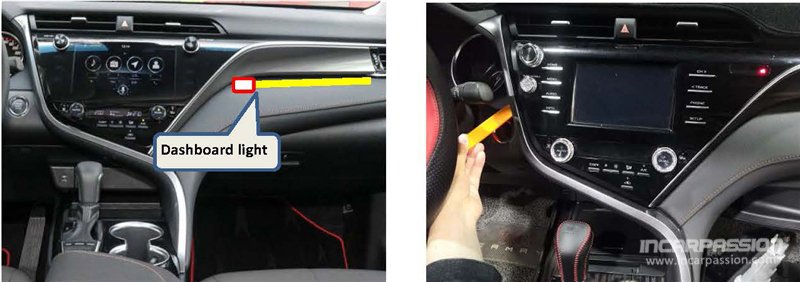
3, Take out the trim
4, Light strip install to original buckle position and fix it

Cup holder and storage box installation
1, Light position
2, Loose the gear leather

3, Take out the spring of gear
4, Remove usb panel

5, Pry out the center console panel
6, Use 5mm driller to make a hole in cup holder position
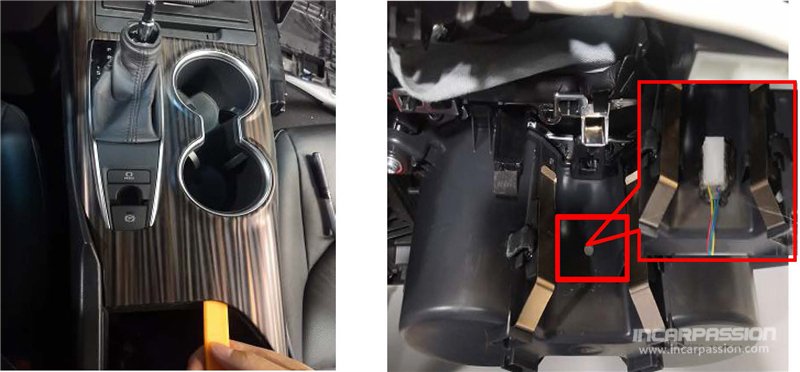
7, Open the storage box light, remove the light case, install our light board to original light case position
Front foot lamp installation
Use the 15mm driller to make hole in footlamp cover and install the foot lamp

Button installation
Install the AML button to original empty button position(replace original empty button)

Control box power cable connection
Power cable connect to driver side fuse box(near foot area) ACC position, GND cable connect to car body
Power cable must connect to ACC, CAN cable no need connect

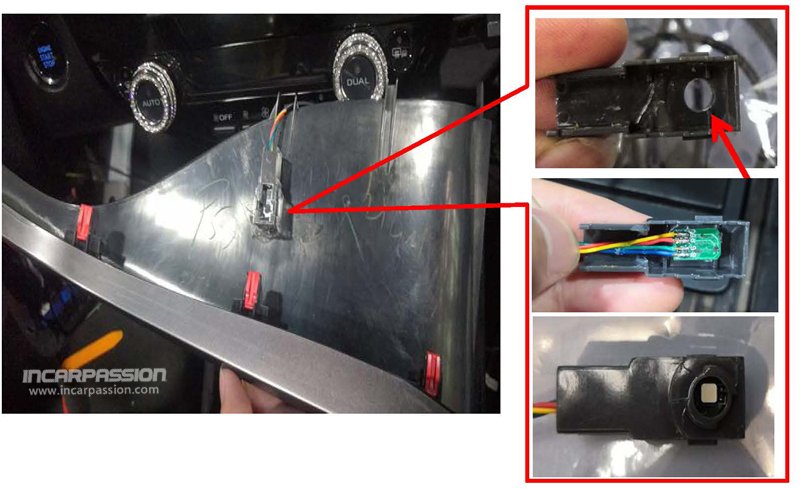
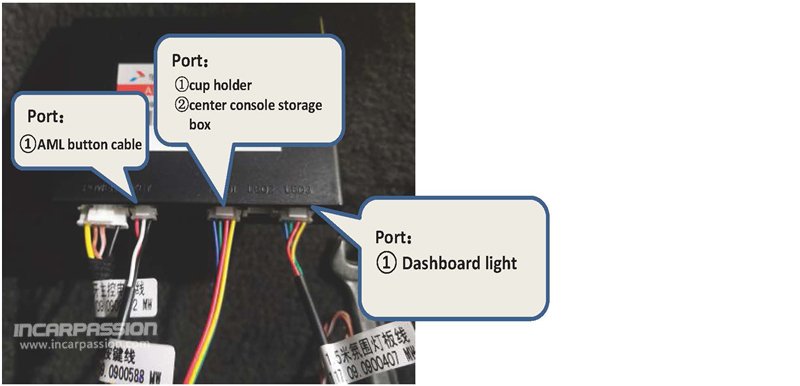
Control box port definition
How to set ambient light colors and brightness
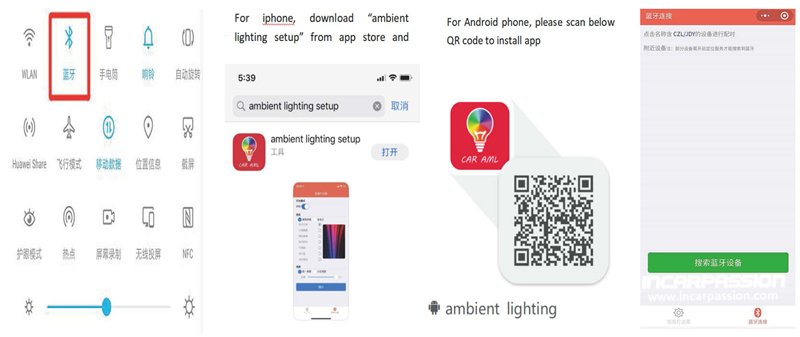
1, Turn on Bluetooth of phone
2, Download ambient light app and open the app
3, At bottom, choose bluetooth connection, then search, find bluetooth name “CZL/JDY” and connect it
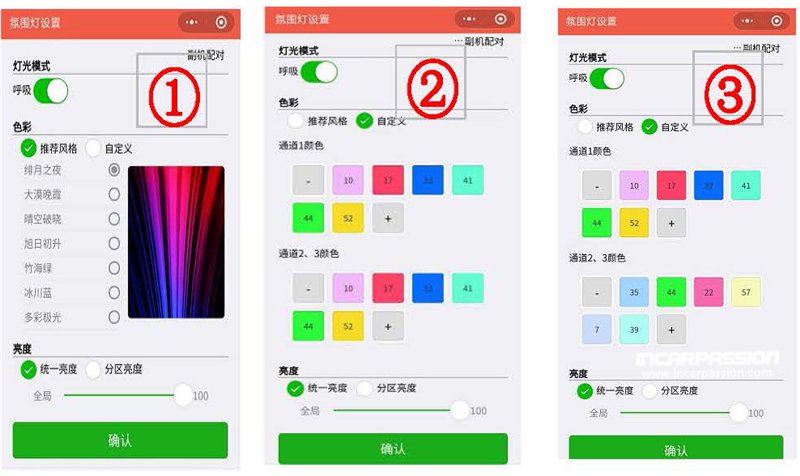
- Recommond Mode: Total 7 colors, up and low light colors is different, use AML button to control light color (pic ①)
- Customized Colors: Can add 6 colors from 64 colors and use AML button to control.
(Note: if all position keep same colors, channel 1 and Channel 2,3 light color and sequence must be same( pic②); Dual zone dual colors, channel 1 and Channel 2,3 light color and sequence must be different(pic③)
Note: After setting color must turn off bluetooth bluetooth, othewerwise light color will not change
Test, Restore
1, turn on car, check if all lights work, if any light not work:
① check if power cable is connect correctly.
② go to apps and set color to customized style and disconnect bluetooth to try again.
2, If Light strip is dark, check if light diodes is connect to correct position.
3, If door light not work, but when headlight on, it can work, check the door ACC cable if connected correctly, must connect to that ACC position always have power.
4,After check all function, restore the car
 Audi
Audi BMW
BMW Mercedes Benz
 BYD
BYD BAIC MOTOR
 Denza
Denza Ford
Ford Geely/ZEEKR
 Honda
Honda Hyundai Kia
 Jaguar
 Jetour
 Jeep
Jeep Lamborghini
 Land Rover
 Lexus
Lexus Li Auto
 Mazda
Mazda Nissan
 Porsche
 Tesla
Tesla Toyota
 Volkswagen
 Volvo
Volvo
I noticed in your instructions, it notes the kit comes with 17 pcs. The kit I ordered came with 19 pcs, the instructions failed to mention how to install the two rear foot lights.