
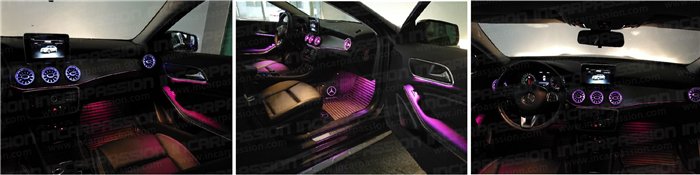
This installation instruction will show you how to install the ambient light for Mercedes Benz GLA X156 CLA C117 A Class W176 B Class W246, upgrade the car with 12 colors ambient light
Product link: 12 Colors Ambient Light for Mercedes A W176 B W246 GLA X156 CLA C117
Note: Before installing the ambient light, we need to activate the ambient light menu, if you don’t have coding device or don’t know how to code, can use our OBD, here’s a OBD instruction video: How to use bluetooth OBD to unlock hidden function for Mercedes
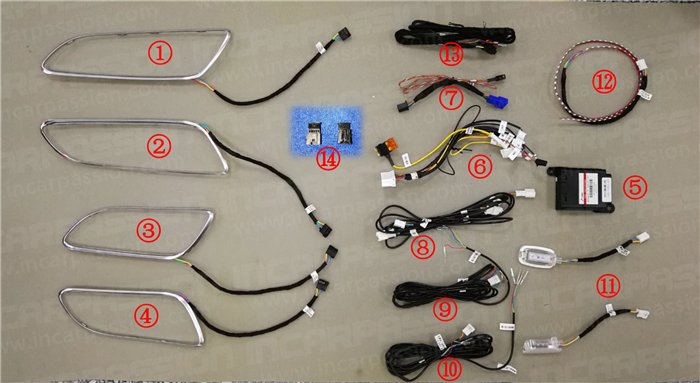
Components
①Left front door light
②Rear front door light
③Left rear door light
④Right rear door light
⑤Control box
⑥Power harness
⑦CAN harness
⑧Foot well light + center console light
⑨Right door cable
⑩Left door cable
⑪Front foot well light x2
⑫Center console light
⑬Rear door cable x2
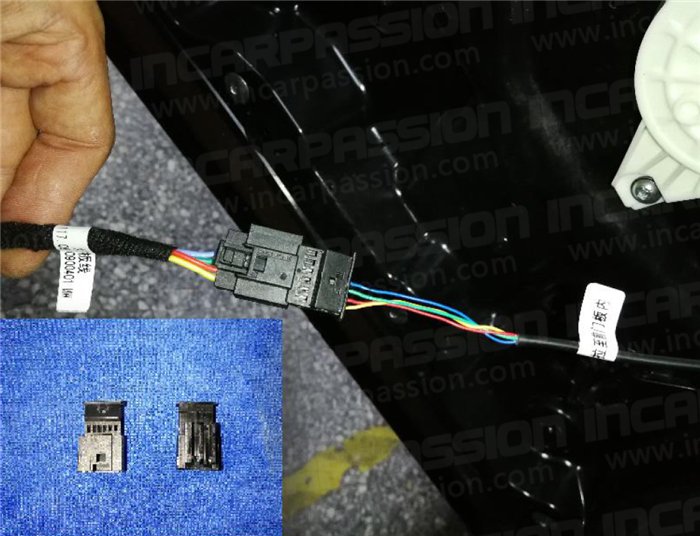
⑭Front door cable socket x2
Ambient Light Installation
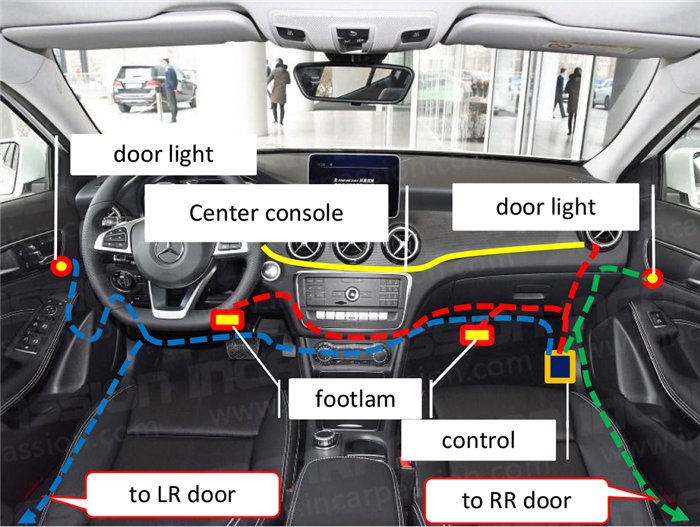
1, Front seat ambient light layout

2, Use screw driver to pry out rubber cover behind the screen

3, Use T20 screw drivers to remove the 2 screws
4, Pull out the harness, remove the screen

5, Remove the original vents as picture show

6, Only need to remove the right air vents, the other 2 vents no need to pry out
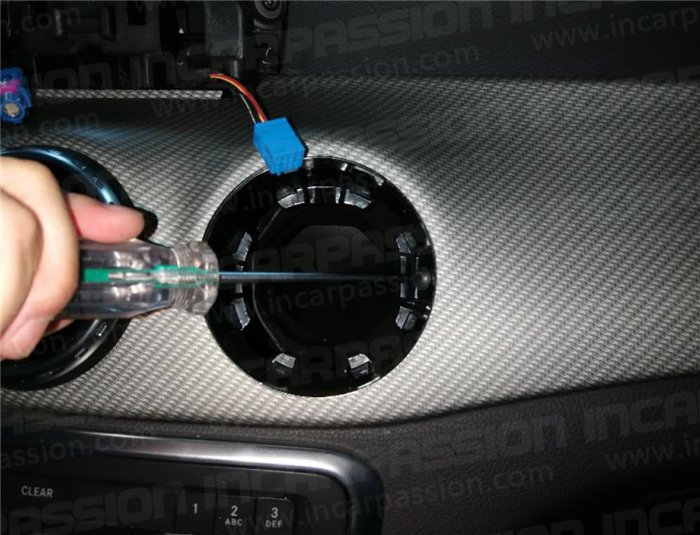
7, Use T20 screws to remove the screw inside the vent
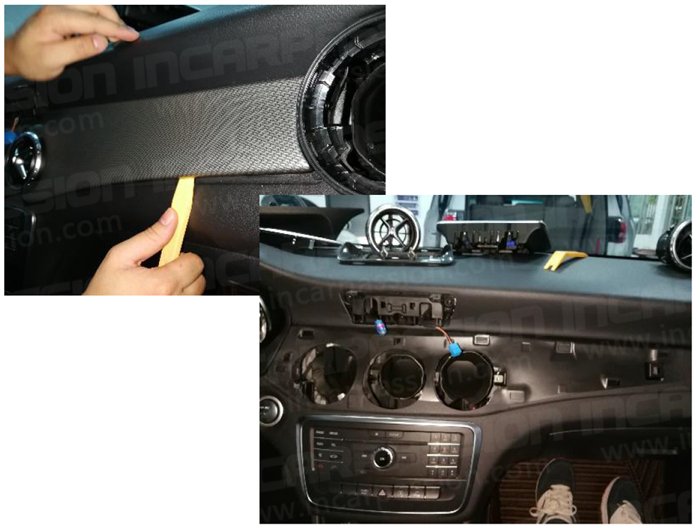
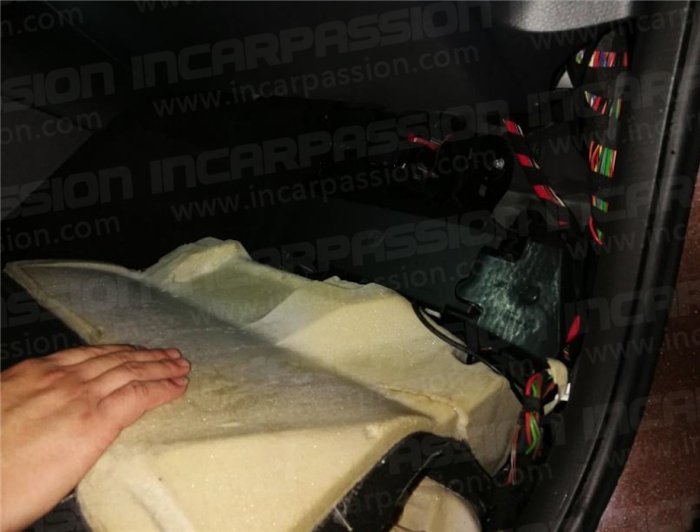
8, Use tool to pry the dashboard panel, then take it out
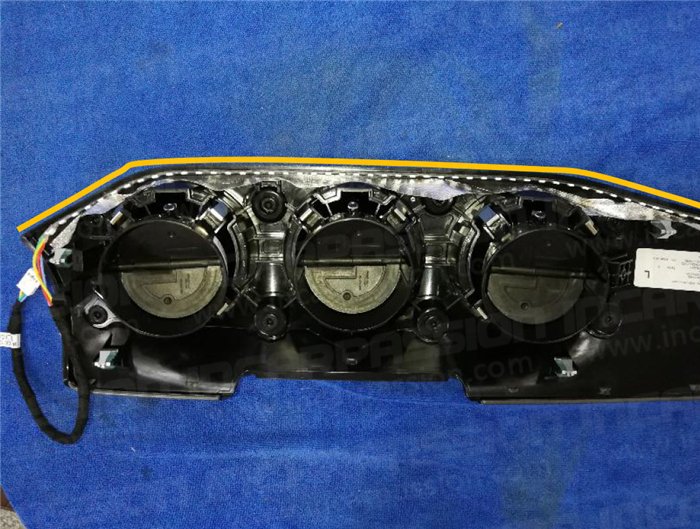
9, Stick the center console light strip as the picture show
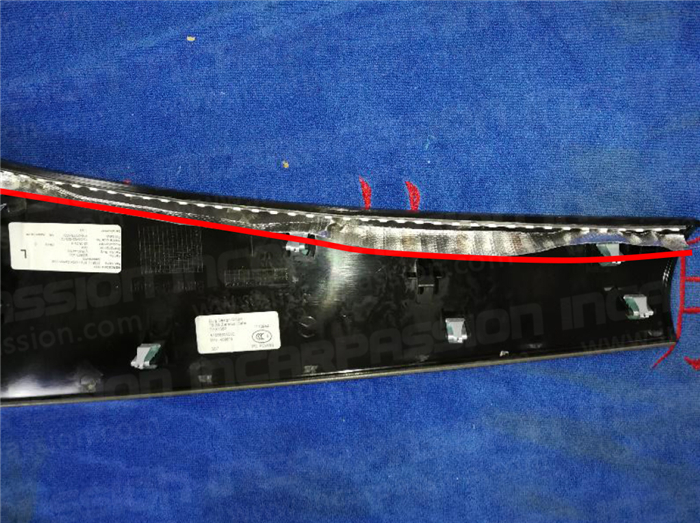
10, Stick the reflective stripe as picture show(Note: must stick this reflective stripe, otherwise lighting effect will be no good)
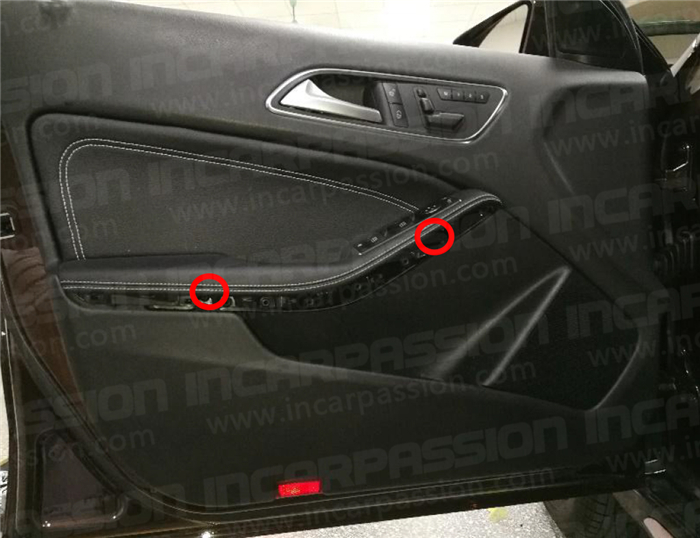
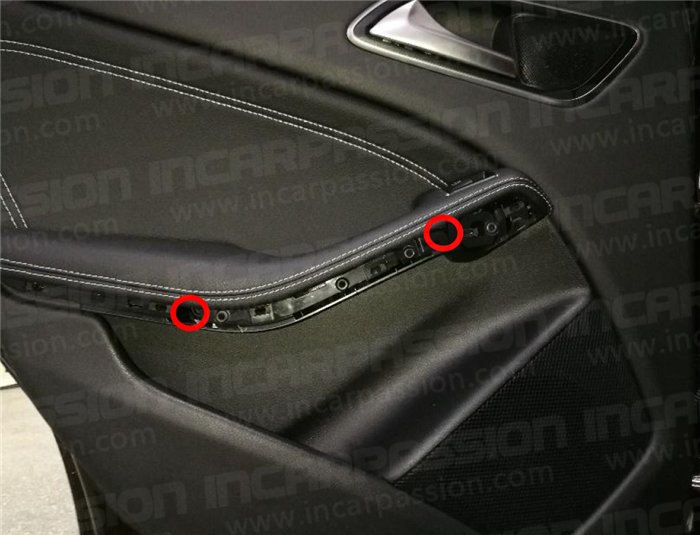
11, Use tool to pry out silver decoration strip, then remove the 2 screws as picture show
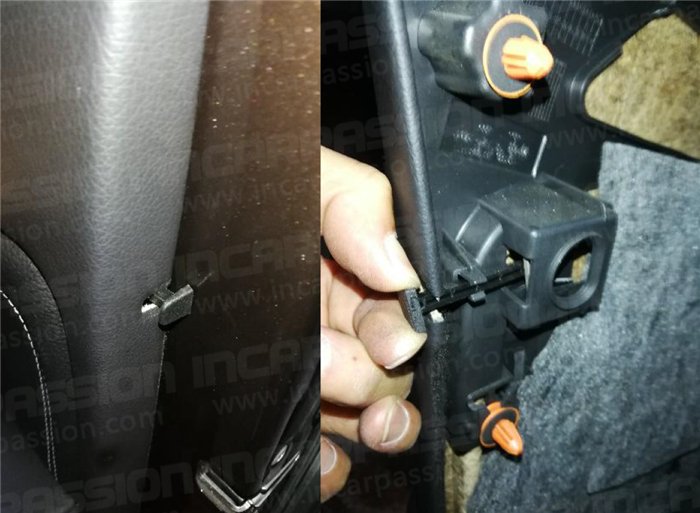
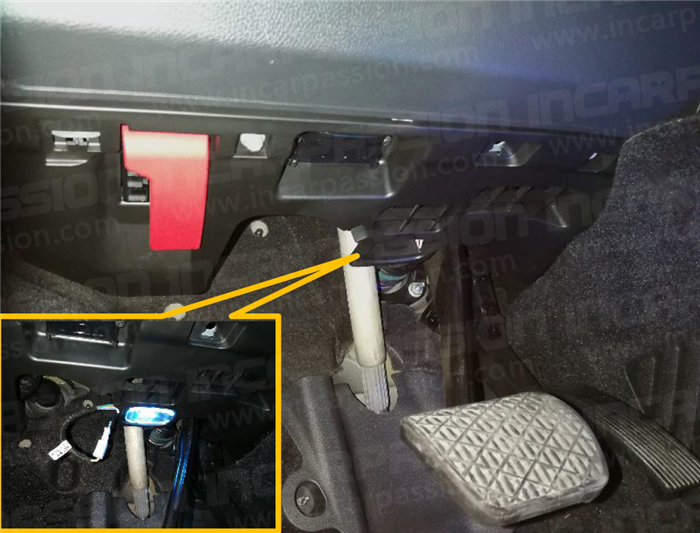
12, Note: Need to pull out this safety pillar before taking out door panel
13, Rear door same way as front door

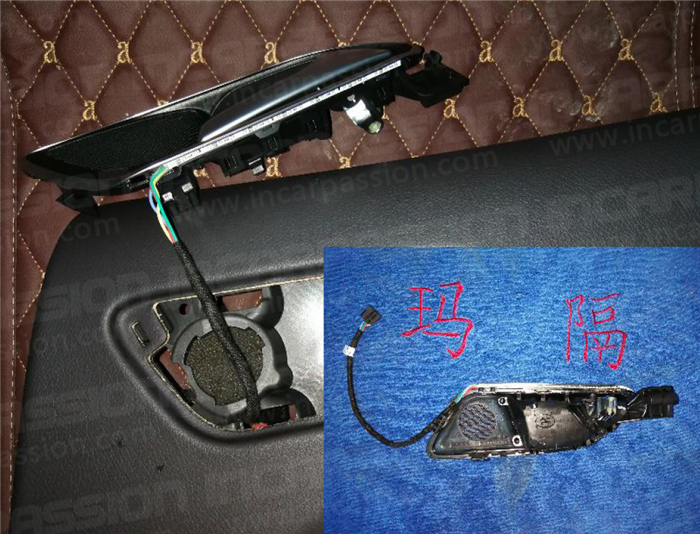
14, Use T20 screw drivers to remove the screw as picture show, take out the door handle unit
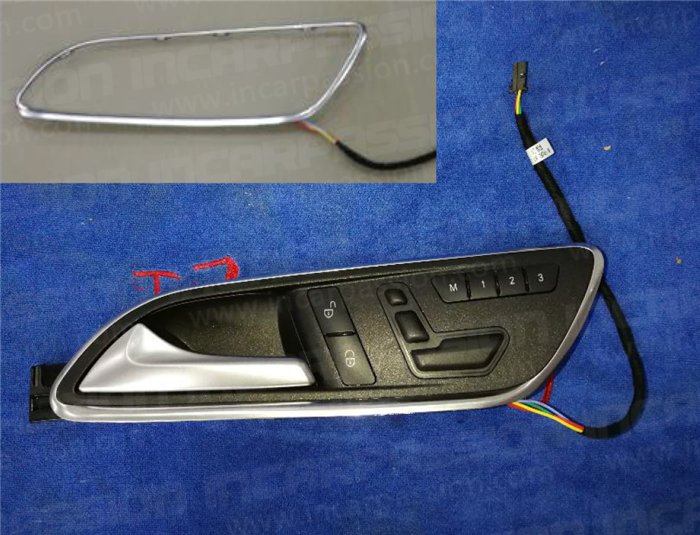
15, Install the silver chrome with ambient light
16, Do it same way for rear door
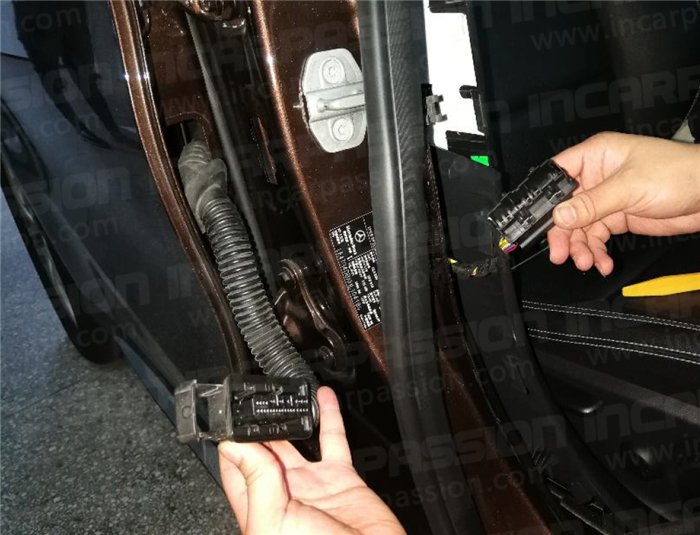
17, Front door cable connect to door handle cable, color to color connection
18, Front door socket fix to original position as above picture show
19, Connect the cable to rear door
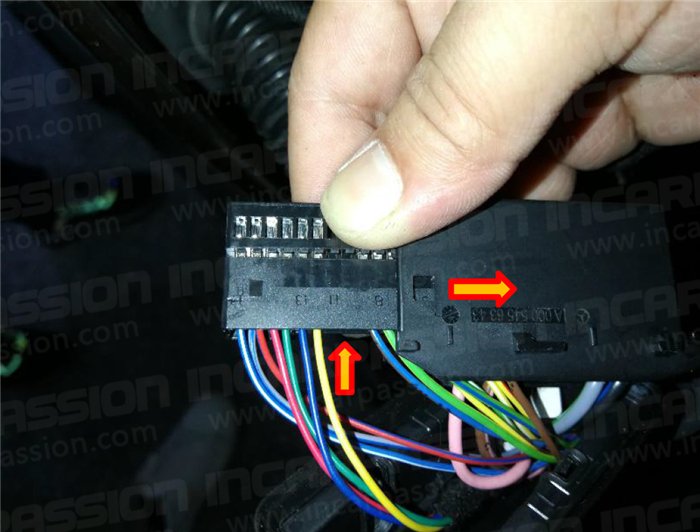
20, Open the socket cover(horizontal direction), then connect the cable to the empty pin of original socket
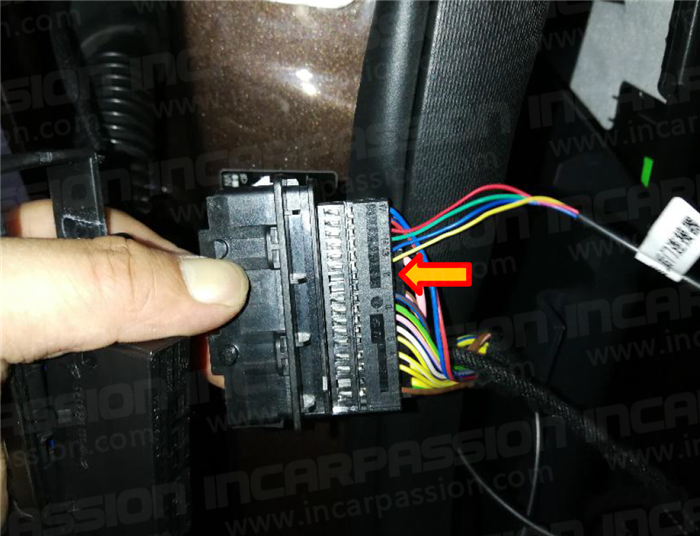
21, Connect the other side of the socket [Note: the color sequence can be randomly, but both side should be same color(color to color connection)]
22, Find the original footlamp position under the baffle and install the footwell lamp
Power cable+CAN cable
1, Open the carpet of passenger seat, we will see the fuse box
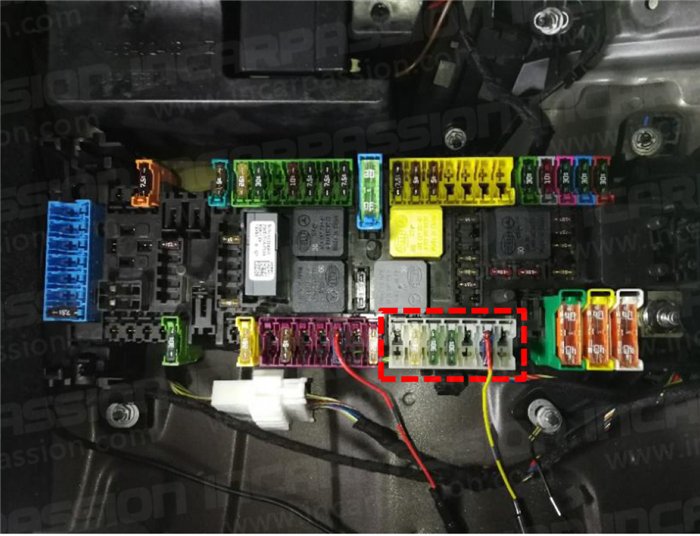
2, Positive cable(Yellow) connects to any empty pin of the white socket as the picture show
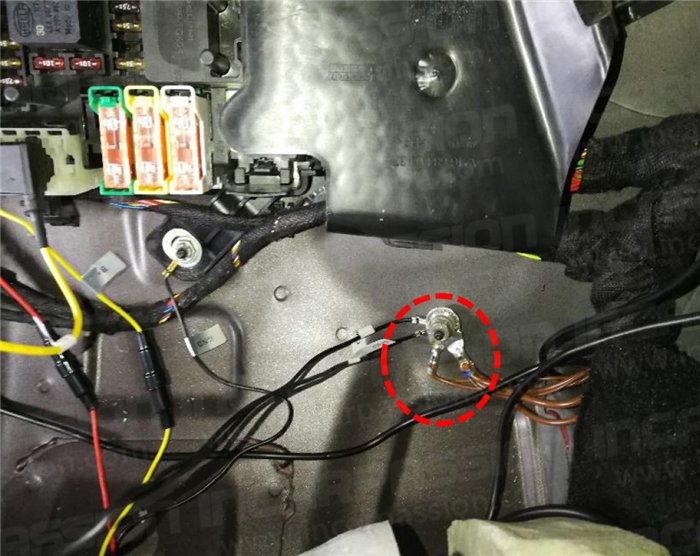
3, Black negative cable connect to the screw position as picture show
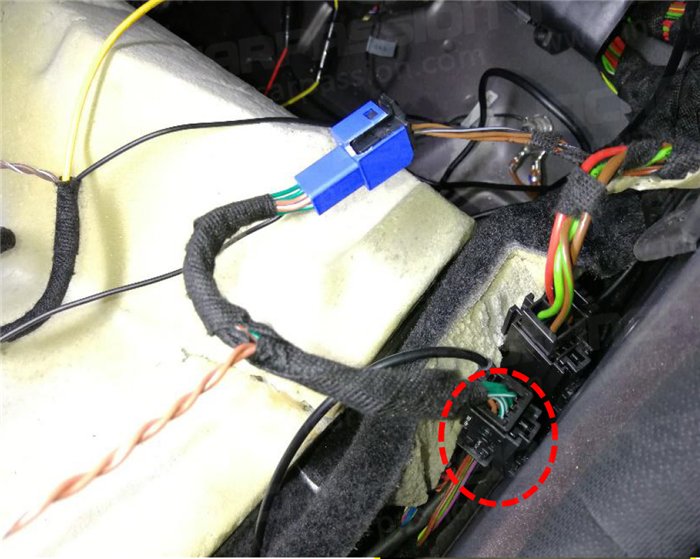
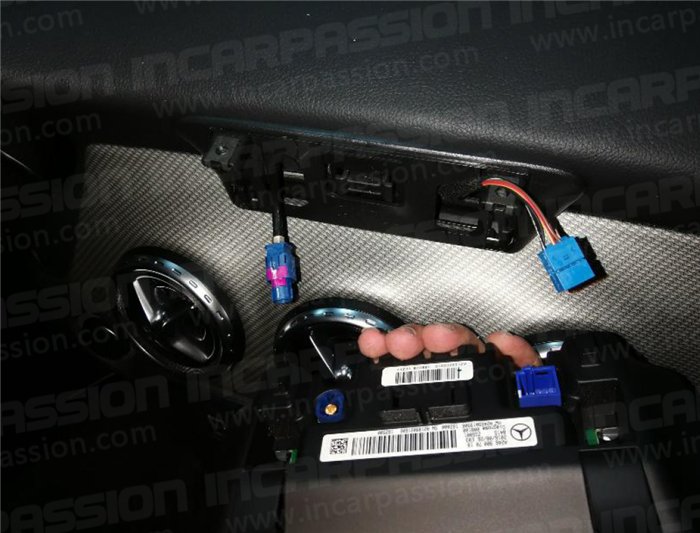
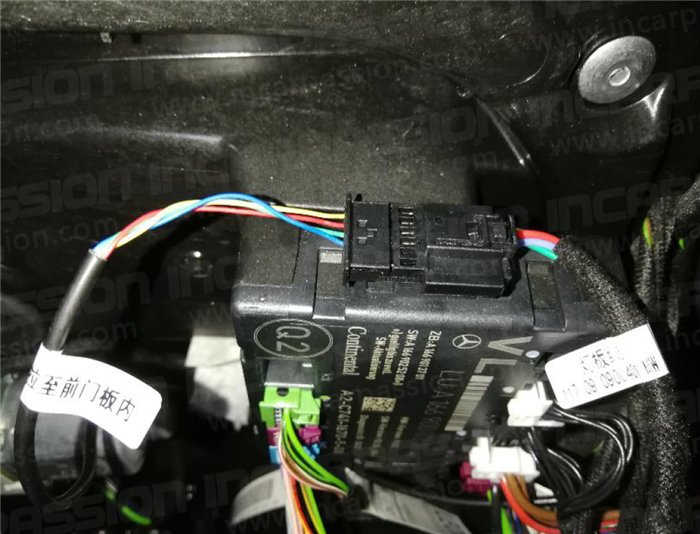
4, Find the CAN socket near the door, pull it out and convert our CAN cable
Test & Restore
1, Connect all the cable, turn on power to check if all lights are on, if all lights can not be turned on, check if power supply is normal, if some lights can not be turned on, turn light brightness from 0 to 5 to check, if still not work, please check if harness is loose
2, Enter vehicle setting-ambient light-color to check if all color works normal, if not, please check if CAN cable is connected correctly
3, If all function works, restore all the parts
Trouble Shoot
1, If the light can not change color, possible CAN cable is not connecting well
2, If color is not synchronize, please lock car 10 minutes and restart to check
After Install
 Audi
Audi BMW
BMW Mercedes Benz
 BYD
BYD BAIC MOTOR
 Denza
Denza Ford
Ford Geely/ZEEKR
 Honda
Honda Hyundai Kia
 Jaguar
 Jetour
 Jeep
Jeep Lamborghini
 Land Rover
 Lexus
Lexus Li Auto
 Mazda
Mazda Nissan
 Porsche
 Tesla
Tesla Toyota
 Volkswagen
 Volvo
Volvo